This guide shows you how to restrict access to your Bullet.so pages based on a customer’s Stripe subscription plan. By integrating Stripe with Bullet.so via Zapier, you can automatically update user access when they subscribe, upgrade, downgrade, or cancel a plan.
For example, you might have three Stripe plans—Personal, Pro, and Premium—each unlocking different content sections on your Bullet site.
### End Result
When a user buys, upgrades, downgrades, or cancels a Stripe subscription, their access to content on your Bullet site updates automatically and instantly.
### What You'll Build
Here's the flow you'll set up:
- User pays via Stripe
- Stripe fires a subscription event
- Zapier listens to the event
- Zapier updates the user’s segment in Bullet.so
- Pages unlock or lock instantly based on the segment
### Prerequisites
To follow this guide, you will need:
- A Bullet.so site with Premium Content enabled.
- A Stripe account with active products/plans.
- A Zapier account.
### Step 1: Create Pricing in Stripe and Add It to Your Bullet Site
First, set up how your users will pay and define your subscription plans in Stripe.
In Stripe, you can use either:
- A Pricing Table
- Payment Links
Create plans that correspond to your desired access levels, such as:
- Personal
- Pro
- Premium
**Important:** Ensure each plan collects the customer’s email address. This email must be pushed to your Bullet dashboard for user identification (more on this in Step 4).
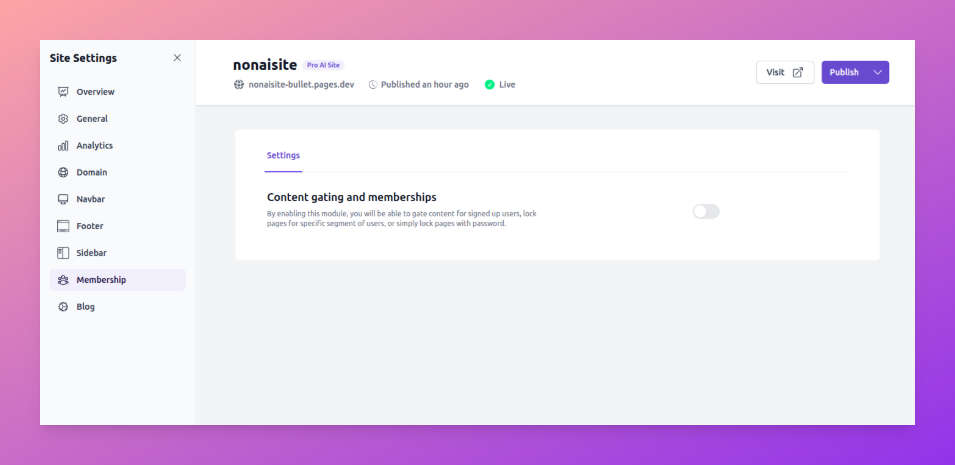
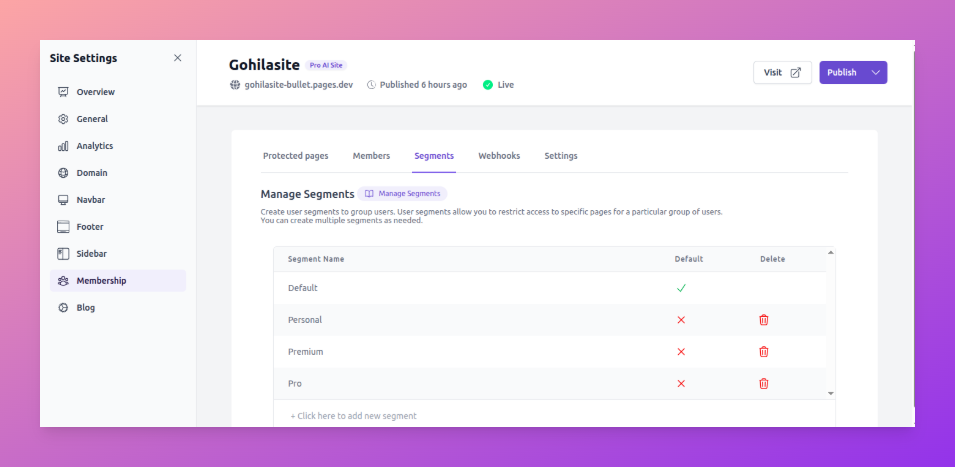
### Step 2: Create Segments in Bullet.so
In Bullet.so, Segments control access to your content.
1. Navigate to **Site > Settings > Memberships** in your Bullet.so dashboard.
2. Create one segment for each Stripe plan you defined:
- `personal`
- `pro`
- `premium`
3. Assign these segments to the relevant pages or folders. It's advisable to structure your pages logically, for example:
- `/personal/content-1`
- `/personal/content-2`
- `/pro/pro-content-1`
- And so on.
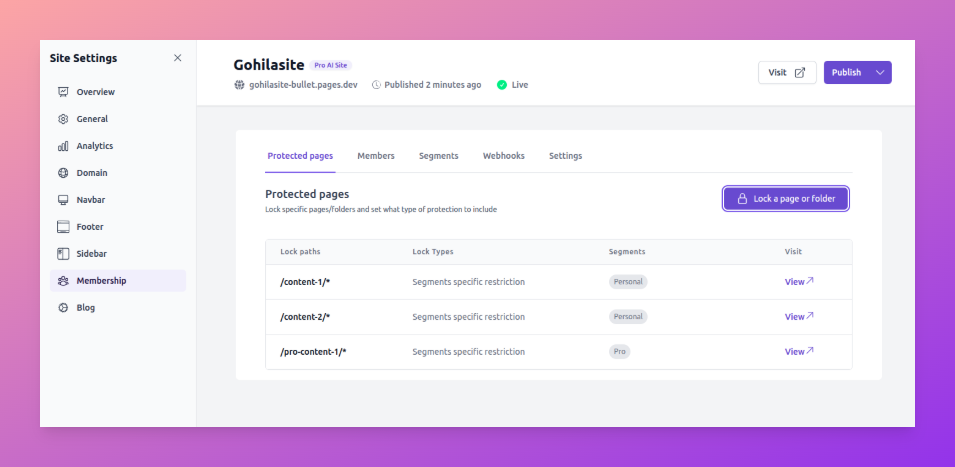
4. Under **Protected pages**, restrict access. For instance, you might restrict `/premium/` content to the `Premium` segment. If `Pro` users should access both `Personal` and `Pro` content, select both `Personal` and `Pro` segments for the `/pro` directory.
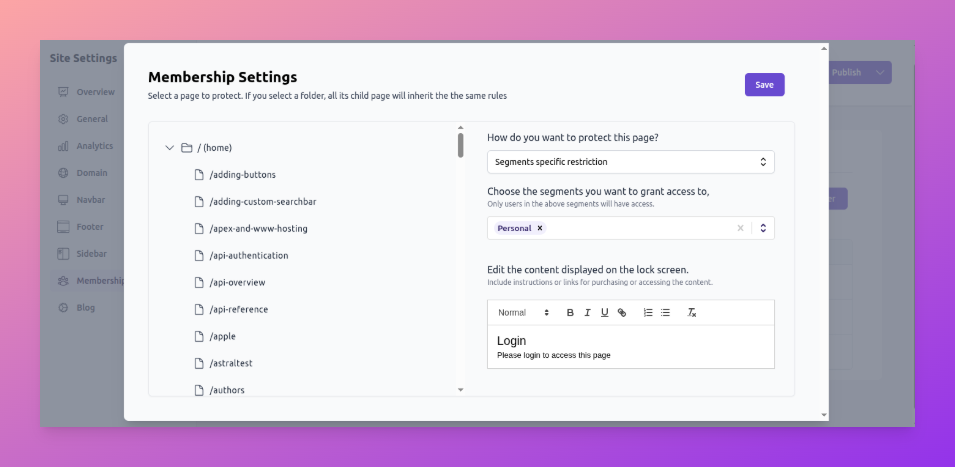
5. Customize the **lock screen** under protected pages. This is what users see when they try to access restricted content. Update the copy and add your Stripe payment link or pricing table if needed.
### Step 3: Get Your Bullet API Key
Zapier will use your Bullet API Key to manage user access.
1. Go to **Dashboard → My Profile** in your Bullet.so dashboard.
2. Copy your API key. You will paste this into Zapier later.

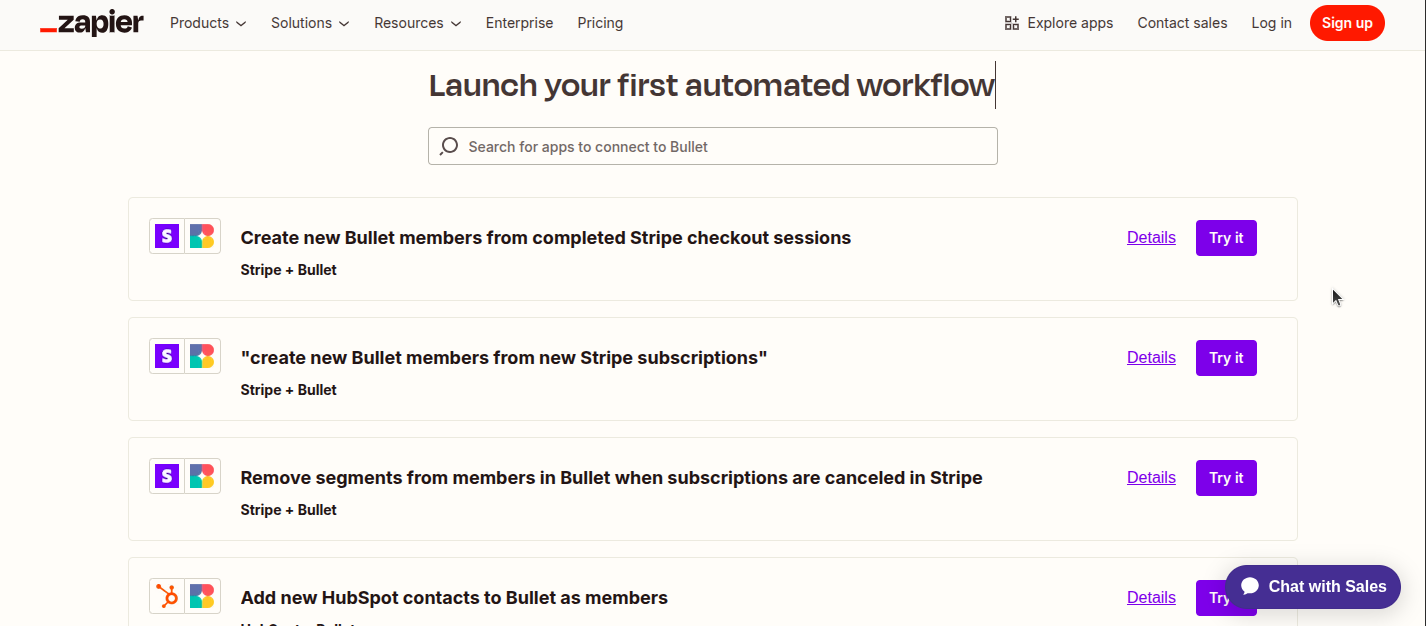
### Step 4: Create a Zap (Stripe → Bullet)
Zapier has Bullet integration published. Also checkout some pre-built templates here [https://zapier.com/apps/bulletso/integrations](https://zapier.com/apps/bulletso/integrations)
You will create a new Zap in Zapier to link Stripe subscription events to Bullet.so segments.
**Trigger (Stripe):** `Customer Subscription Created`
This Zap runs when a user successfully subscribes to a plan in Stripe.
In Zapier:
1. Configure the Stripe trigger to listen for `Customer Subscription Created` events.
2. Read the **Stripe Price ID** or **Plan Name** from the trigger event.
3. Use an action step to assign the user (identified by their email collected in Stripe) to the corresponding segment in Bullet.so.
- Example mapping:
- `Personal` (Stripe plan) → `personal` (Bullet segment)
- `Pro` (Stripe plan) → `pro` (Bullet segment)
- `Premium` (Stripe plan) → `premium` (Bullet segment)
If your Stripe plan names differ from your Bullet segments, ensure you map them correctly within Zapier.
### Step 5: Handle Upgrades and Cancellations
To ensure continuous and correct access control, create two additional Zaps for subscription updates and cancellations. Do not skip these steps, as canceled users should lose access.
**Zap 2: Subscription Updated → Switch Segment**
1. **Trigger (Stripe):** `Customer Subscription Updated`
2. **Action (Bullet):**
- Remove the user from their old segment.
- Add the user to their new segment based on the updated subscription plan.
**Zap 3: Subscription Deleted → Remove Segment**
1. **Trigger (Stripe): **`Customer Subscription Deleted`
2. **Action (Bullet):**
- Remove the user from all premium segments they were previously assigned to.
### Minimal Zap Setup Summary
For a robust and easily debuggable setup, you will have three Zaps:
- **Zap 1:** `Subscription Created` → Add Segment
- **Zap 2:** `Subscription Updated` → Switch Segment
- **Zap 3:** `Subscription Deleted` → Remove Segment
### Quick Test
Before deploying your setup to live users, perform a quick test:
- **Buy a plan:** Verify that content associated with that plan unlocks. (Tip: You can create a 100% discount coupon to test purchases.)
- **Upgrade a plan:** Confirm that more content (for the upgraded plan) unlocks, and old content remains accessible if applicable.
- **Cancel a plan:** Ensure that the previously accessible content locks.
If any of these tests fail, troubleshoot and fix the Zap configuration before making it live.
How to Restrict Pages by Stripe Plan Using Zapier
This guide shows you how to restrict access to your Bullet.so pages based on a customer’s Stripe subscription plan. By integrating Stripe with Bullet.so via Zapier, you can automatically update user access when they subscribe, upgrade, downgrade, or cancel a plan.
For example, you might have three Stripe plans—Personal, Pro, and Premium—each unlocking different content sections on your Bullet site.
When a user buys, upgrades, downgrades, or cancels a Stripe subscription, their access to content on your Bullet site updates automatically and instantly.
First, set up how your users will pay and define your subscription plans in Stripe.
In Stripe, you can use either:
A Pricing Table
Payment Links
Create plans that correspond to your desired access levels, such as:
Personal
Pro
Premium
Important: Ensure each plan collects the customer’s email address. This email must be pushed to your Bullet dashboard for user identification (more on this in Step 4).
In Bullet.so, Segments control access to your content.
Navigate to Site > Settings > Memberships in your Bullet.so dashboard.
2. Create one segment for each Stripe plan you defined:
- personal
- pro
- premium
3. Assign these segments to the relevant pages or folders. It's advisable to structure your pages logically, for example:
- /personal/content-1
- /personal/content-2
- /pro/pro-content-1
- And so on.
4. Under Protected pages, restrict access. For instance, you might restrict /premium/ content to the Premium segment. If Pro users should access both Personal and Pro content, select both Personal and Pro segments for the /pro directory.
5. Customize the lock screen under protected pages. This is what users see when they try to access restricted content. Update the copy and add your Stripe payment link or pricing table if needed.
To ensure continuous and correct access control, create two additional Zaps for subscription updates and cancellations. Do not skip these steps, as canceled users should lose access.
Zap 2: Subscription Updated → Switch Segment
Trigger (Stripe):Customer Subscription Updated
Action (Bullet):
- Remove the user from their old segment.
- Add the user to their new segment based on the updated subscription plan.
Zap 3: Subscription Deleted → Remove Segment
Trigger (Stripe): Customer Subscription Deleted
Action (Bullet):
- Remove the user from all premium segments they were previously assigned to.