# Multiple languages for your Website
The **Multilingual Sites** feature in Bullet lets you build websites in multiple languages. You can assign language tags to specific parts of your site, making it easy for visitors to navigate in their preferred language.
To set up multilingual content for your site, follow these steps:
## 1. Enabling the Multilingual Feature
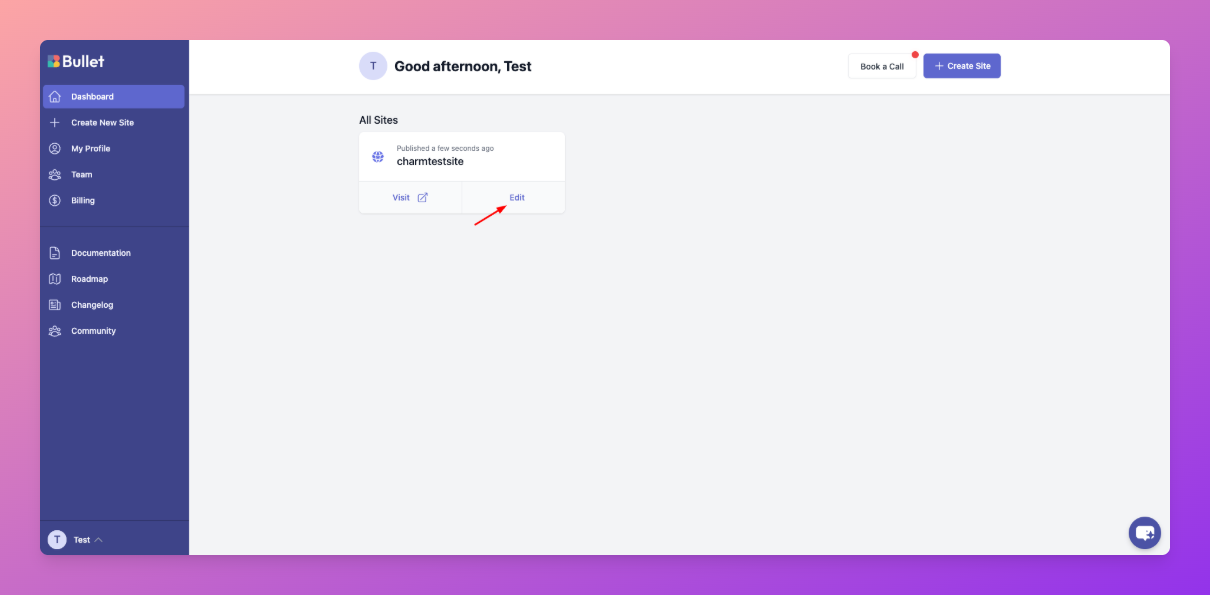
* Go to your Bullet dashboard and open the Site Dashboard.
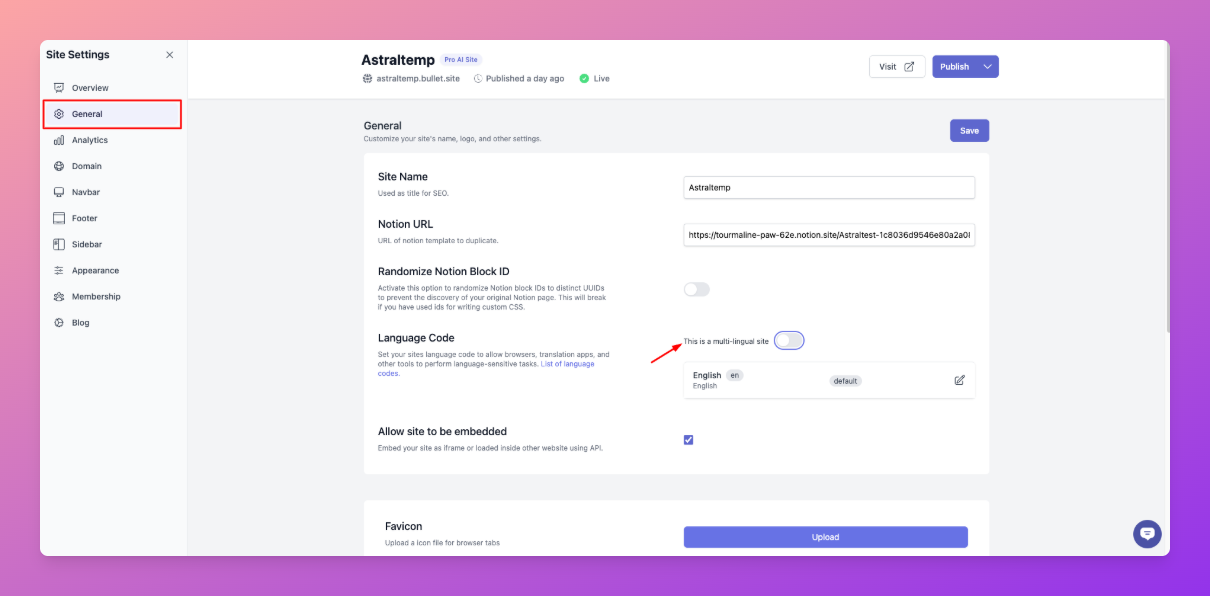
- Navigate to **Settings > General** of your site.
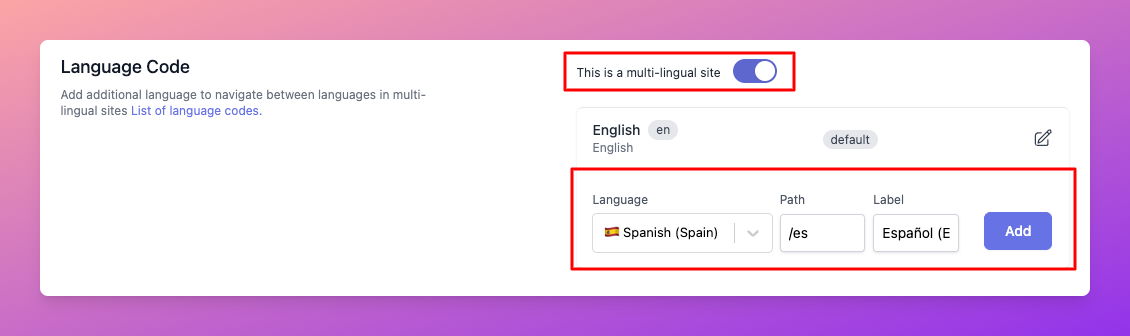
* Toggle the **“This is a multi-lingual site”** option to enable the feature.
## 2. Adding Languages & Assigning Paths
Once the multilingual feature is activated:
* Click **“Add Language”** and select the languages you want to support.
* Assign **language tags** to specific pages by defining a **path** in the language settings.
**Understanding Path Property & Labels**
* **Language Label:** This is the name displayed in the language switcher. For example, adding "Español" (Spanish) as a label will show it in the language switcher menu.
* **Path Property:** This determines which section of your site appears in a specific language.
Example: If you set `/es` as a path for Spanish,
* The language switcher menu will point to `/es` when clicked on that Language.
* All the pages under `/es` (like `/es/blog`, `/es/about`) will have the HTML `lang=“es”` tag set, so that Google understands this part of the website is in Spanish.
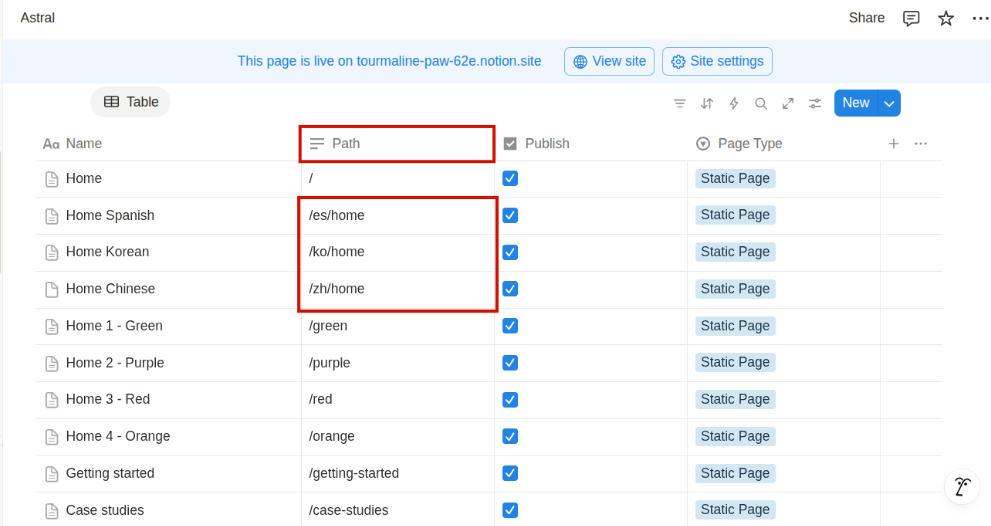
## 3. Adding Multilingual Pages in Notion
* Create a new page, add content in the target language, and set the path accordingly — for example, `/es/home` for Spanish or `/ko/home` for Korean
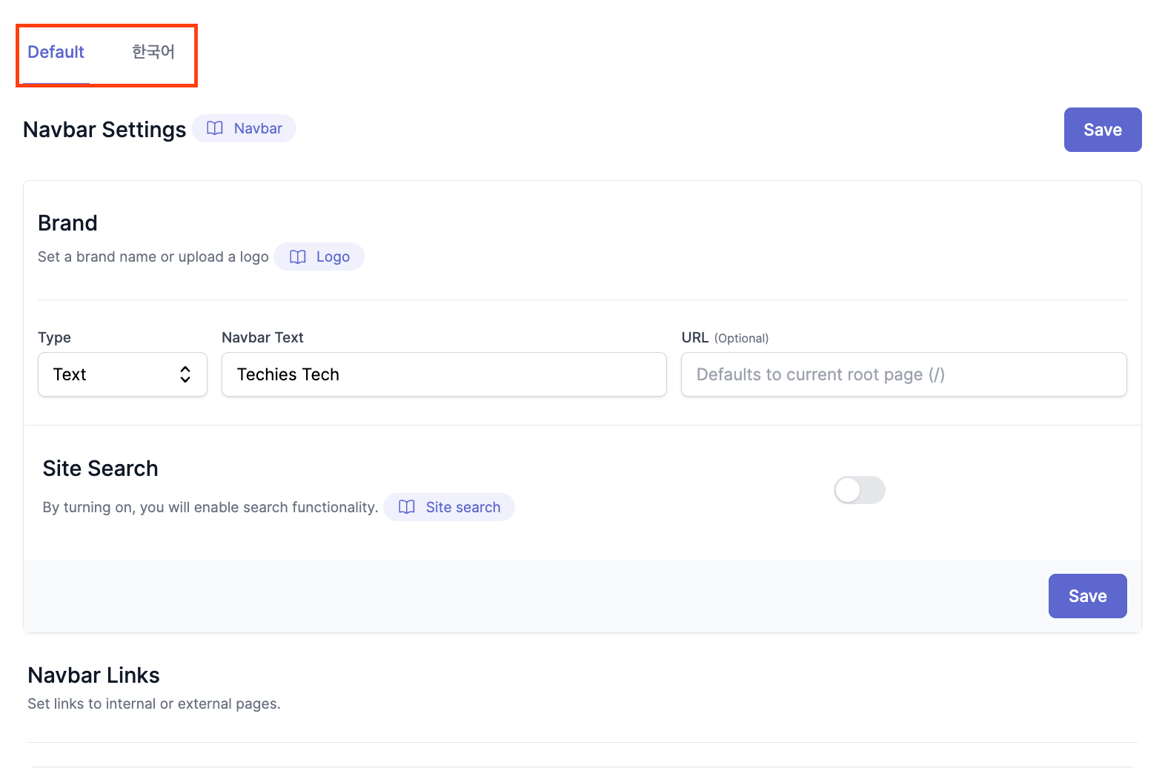
## 4. Customizing Navigation & Footer for Each Language
Each language can have its own **custom navbar and footer**.
* Once you add a new language as mentioned above, navigate to your **Navbar** options, and you will see the option to configure a language-specific navbar.
* Example:
* For English, your navbar may have: **Home | Blog | Contact**
* For Spanish, you can customize it as: Inicio | Blog | Contacto
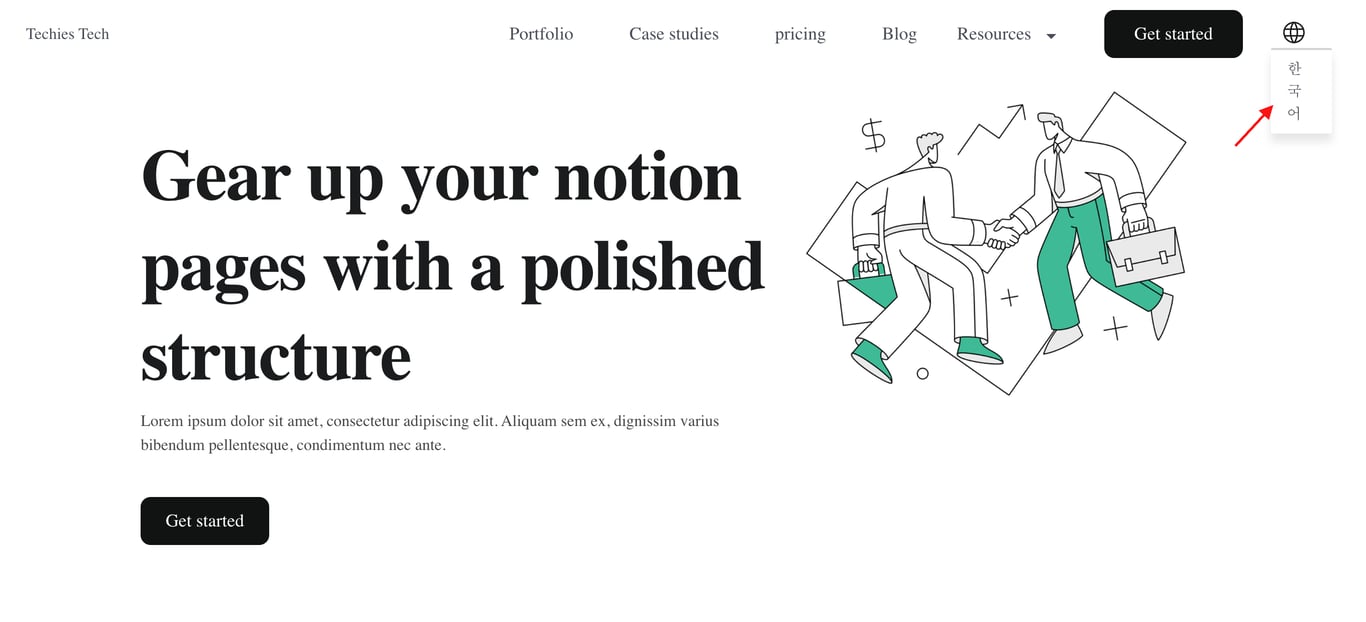
**Preview of Multilingual Navbar & Language Switcher:**
## 5. Saving & Publishing Changes
* Click **Save** after setting up languages, paths, and navigation.
* Click **Publish** to apply the changes to your live site.
Once published, a **globe icon** will appear in the top-right corner of your site. Visitors can click it to switch between available languages, displaying only the content assigned to their selected language.
For a detailed, step-by-step guide on creating a multilingual site, **[check out our blog.](https://bullet.so/blog/building-multi-language-site-using-notion/)**
The Multilingual Sites feature in Bullet lets you build websites in multiple languages. You can assign language tags to specific parts of your site, making it easy for visitors to navigate in their preferred language.
To set up multilingual content for your site, follow these steps:
Click “Add Language” and select the languages you want to support.
Assign language tags to specific pages by defining a path in the language settings.
Understanding Path Property & Labels
Language Label: This is the name displayed in the language switcher. For example, adding "Español" (Spanish) as a label will show it in the language switcher menu.
Path Property: This determines which section of your site appears in a specific language.
Example: If you set /es as a path for Spanish,
The language switcher menu will point to /es when clicked on that Language.
All the pages under /es (like /es/blog, /es/about) will have the HTML lang=“es” tag set, so that Google understands this part of the website is in Spanish.
Click Save after setting up languages, paths, and navigation.
Click Publish to apply the changes to your live site.
Once published, a globe icon will appear in the top-right corner of your site. Visitors can click it to switch between available languages, displaying only the content assigned to their selected language.
For a detailed, step-by-step guide on creating a multilingual site, check out our blog.
Was this page helpful?
How can we improve?
Start typing to search documentation…
Pages
Ask AI assistant
AI Assistant
Sources cited
AI is thinking
Hi! I'm your AI assistant. Ask me anything about this documentation.